How to Create a Notebook Page
1. Prepare materials for submission
We use GitHub to host notebooks to share. For more information about registering for a Github account, check out this guide. Please store your notebook .ipynb file and all needed materials in one GitHub repository. If your notebook requires a large data set, contact us to discuss making arrangements for shared data access.
Please only store materials needed to run your notebook in this repository. Everything in this repository will be copied to a user’s CyberGISX Jupyter file system when they click “Open with CyberGISX”. You will need the path to your GitHub repository to create a notebook page.
If you have several strongly related notebooks that are explicitly linked, share many of the same resources, and focus on a single problem, your repository may contain multiple .ipynb files. If this is the case, you will need to designate one notebook file as the primary notebook for this submission. This primary notebook should be at the top level of the GitHub repository (i.e. not within a subfolder). Only this main file will be displayed publicly on the CyberGISX page to allow for a preview of notebook contents. It is strongly recommended to provide links from the main notebook to any extra notebooks in the repository.
External webpage links within notebooks are allowed as long as they adhere to our (community standards) but these may cause difficulties if the linked content changes. Please make sure that any links within your notebook are not relative links to local files to make sure they will work for other users.
The repository should contain a README file with information about the notebook and data used.
We will be sharing your notebook on CyberGISX platform. By uploading your notebook, you indicate that you are able to share the content contained within the notebook.
2. Log in to CyberGISX
To create a new notebook page you must first log in to CyberGISX. Select the “Log In” button in the top-right menu bar. Once you have logged in, your username will be displayed in the place that used to say “Log In”.

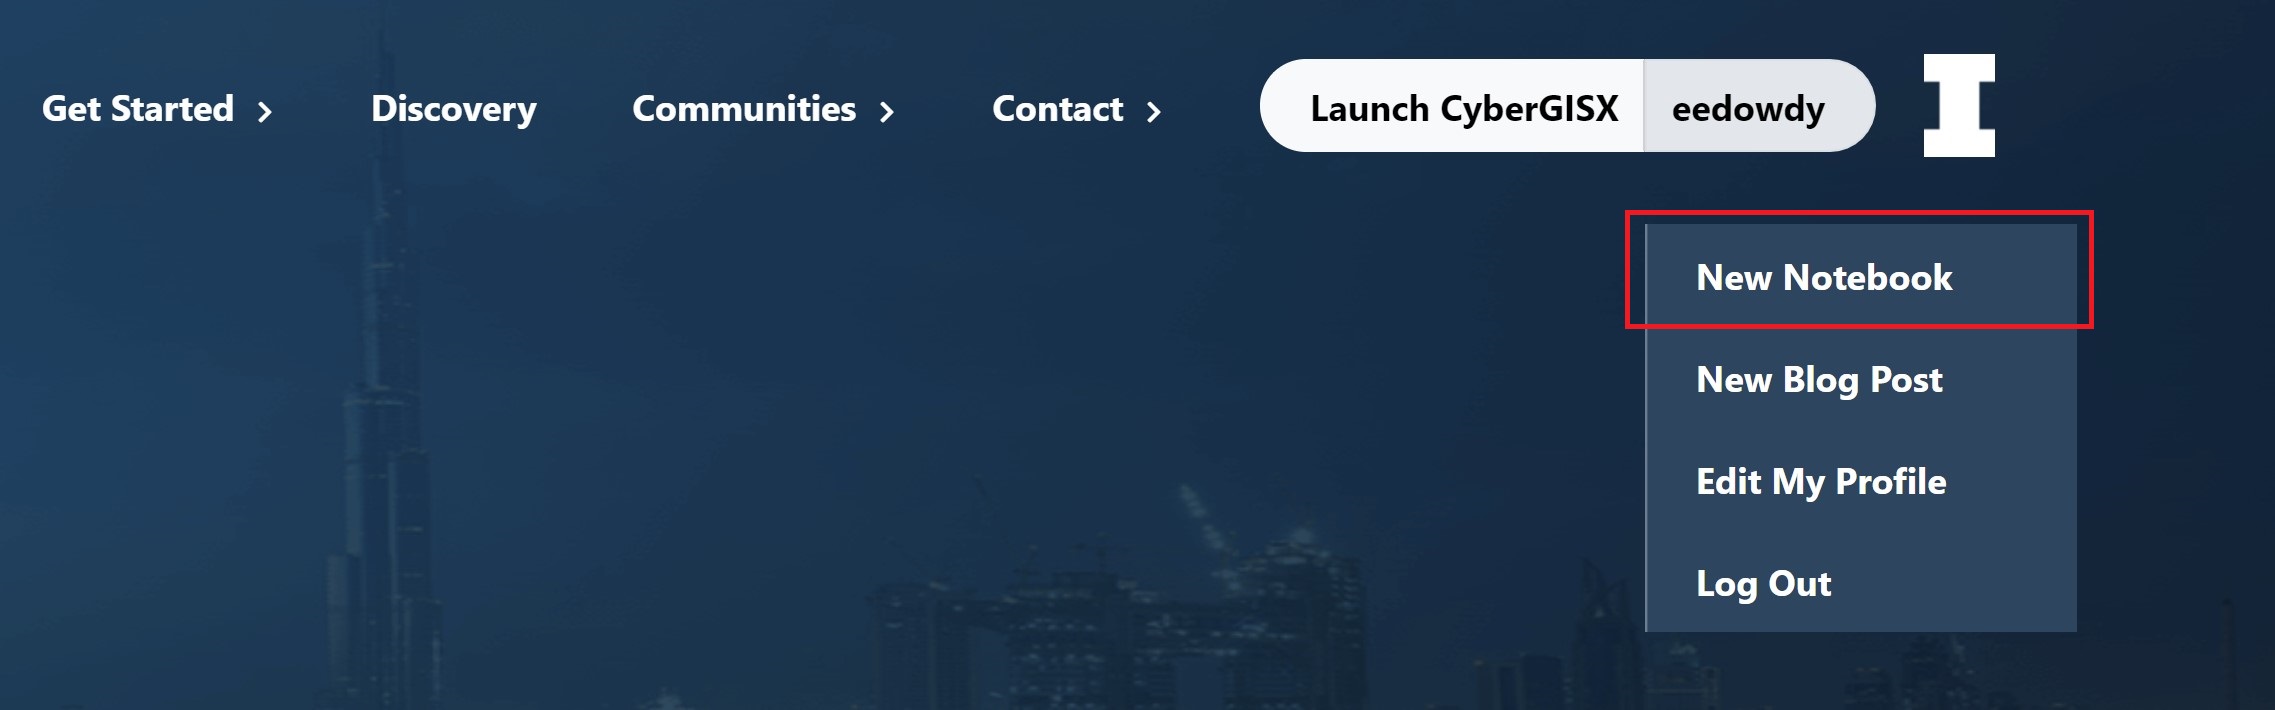
3. Start a new notebook page
After you have logged in, hover your cursor over your username which is displayed on the top-right menu bar. You will see a drop-down menu. On this menu, select “New Notebook”. This will open a page containing the notebook page editor.
4. Add content
Your notebook page needs a title! Insert text into the “Title” textbox to give a title to your page. A good idea is to use the same title that you used for your notebook. Note that the title you use the first time you publish your post will be used in the web address for your post even if you change it later.
You can upload a Featured Image that will be used on your notebook page preview. You can upload and insert media by clicking the “Add Image” button. This will open a media editor popup window. You can add media files in “Upload Files” tab. If you want to use a file in your current post, select files in the “Media Library” tab by clicking on them. Once you have some files selected you can click the “Insert into Post” button in the lower right-hand corner to add the files to your post. Please keep the image file size under 2MB.
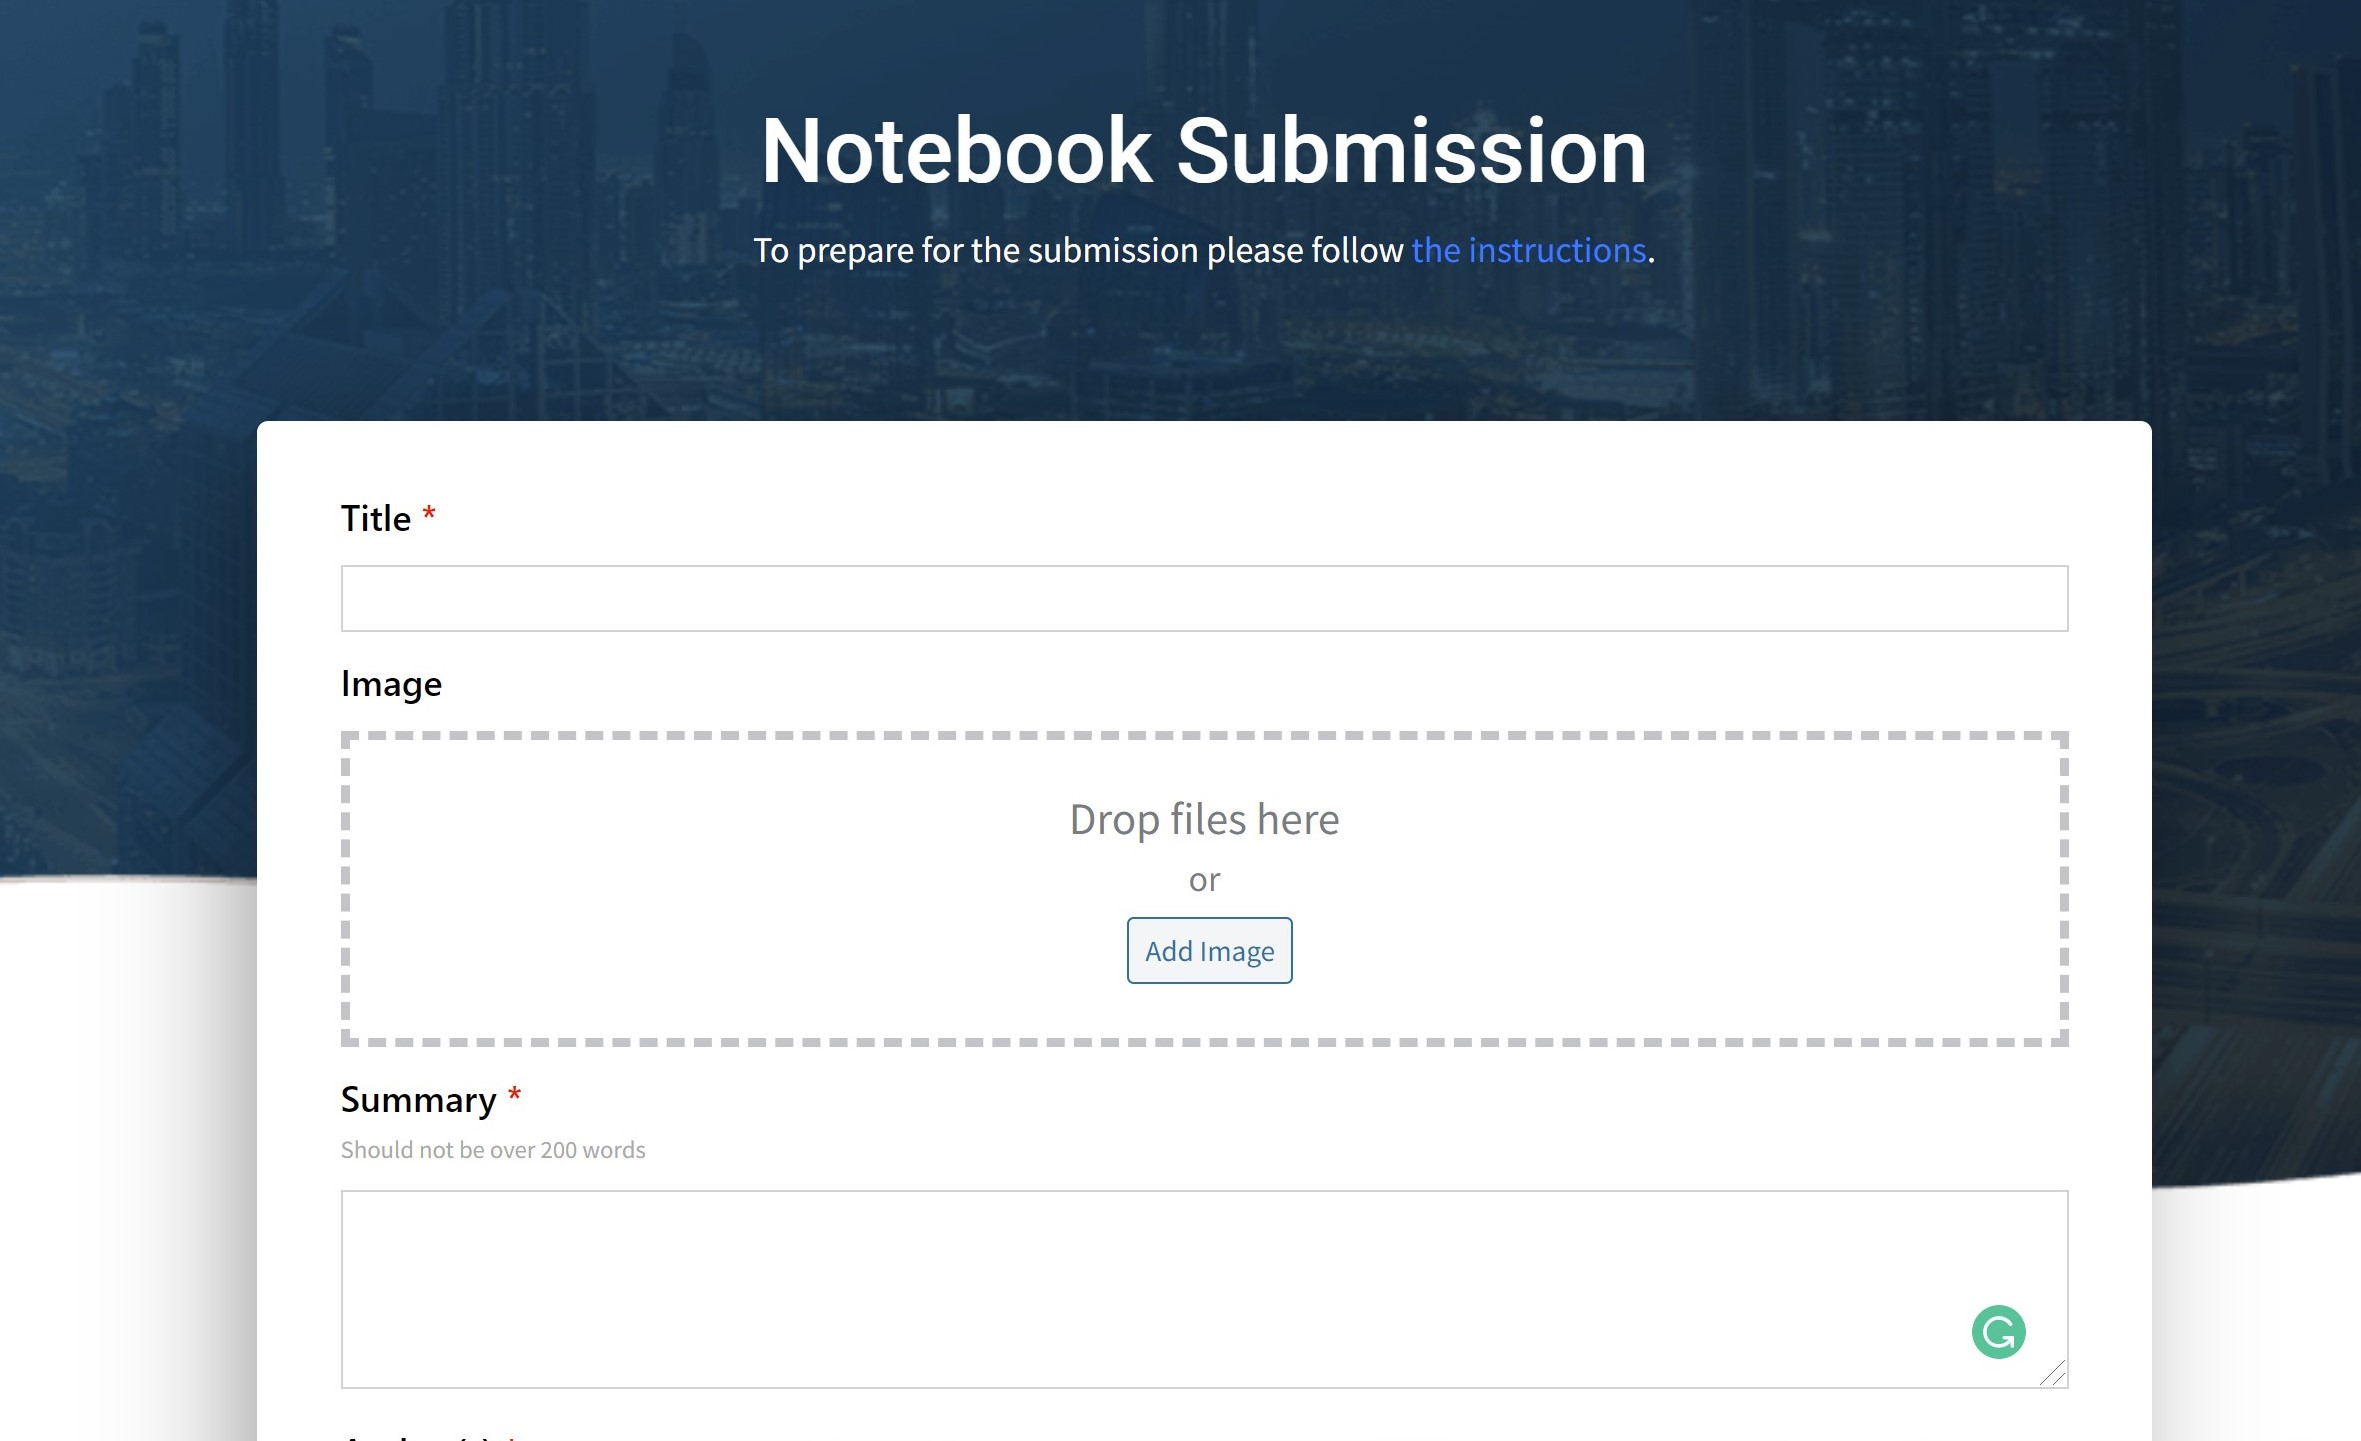
A brief summary of your notebook should be added in the “Summary” text box. You can then add notebook authors in the “Authors” textbox.
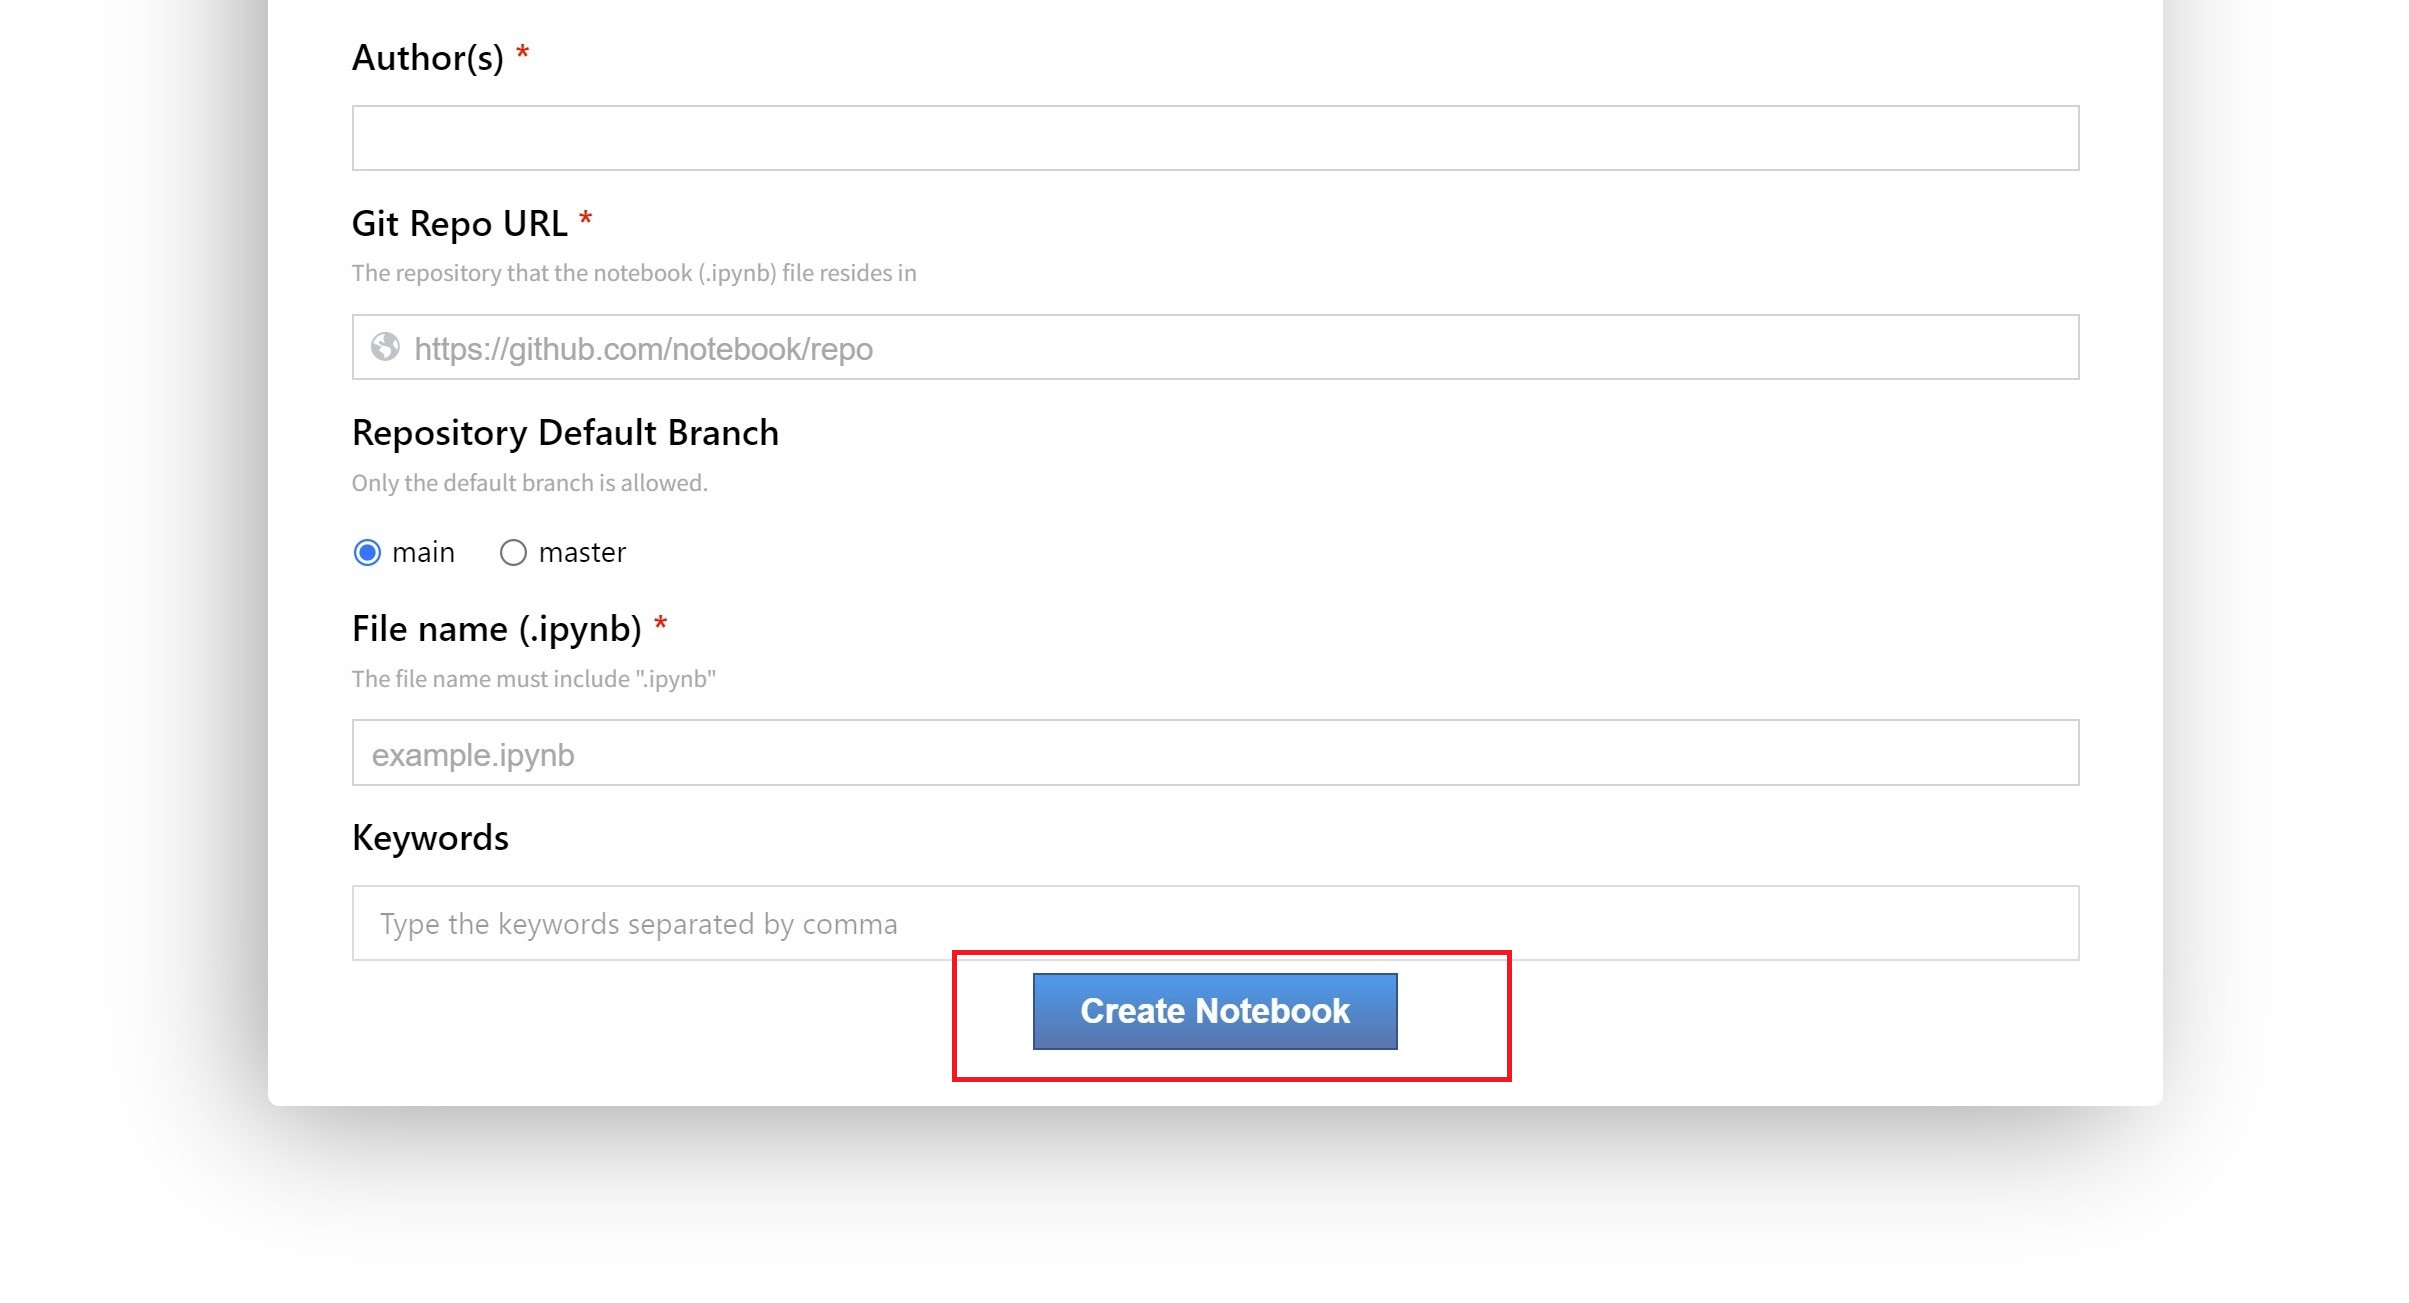
Next, you need to add the GitHub repository link and specify your primary notebook file (this file should have the extension .ipynb). You will need to select a branch, either “main” or “master”. More recently created repositories will use “main”.
Finally, you can add keywords to be associated with your notebook using a comma as a separator. Keywords are case insensitive.
Below the “Keywords” text box is a button for you to create the notebook page.
5. See all of your notebook pages
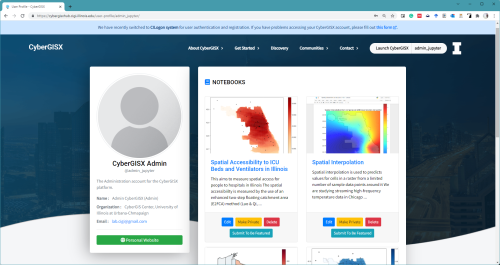
Once you have created a notebook page you can view your pages by logging in to CyberGISX and selecting your username. This will bring up your CyberGISX user profile page. On this page, you will see both public and private notebook pages in the “Notebooks” section. Each notebook page has a set of buttons associated with it on this page. Select “Edit” to bring back the notebook page form and make changes. The next button is displayed as either “Make Public” or “Make Private” and toggles the notebook page state between public or private. Finally, you can delete the notebook page by clicking the “Delete” button. Note that this does not delete your actual notebook, just the page that you created for it.
6. View and share a specific notebook page
From the “User Profile” page, you can click on the title of a notebook page to view the full page in a new window. You can share your notebook page by sending the web address of the notebook page to friends as long as the notebook page is set to public.
